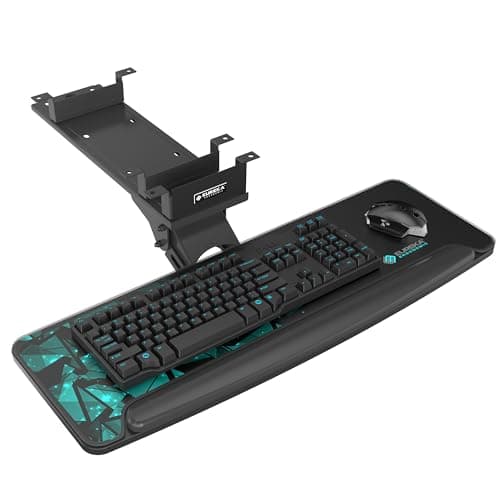
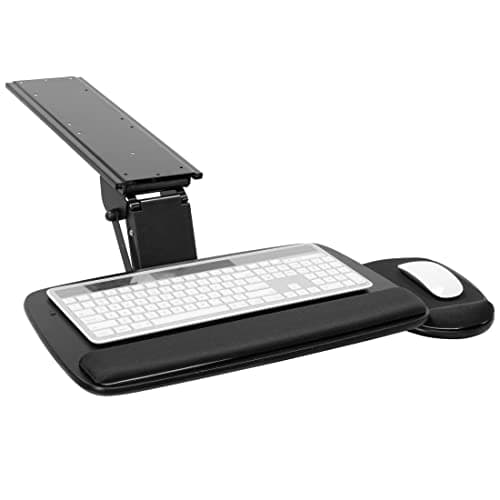
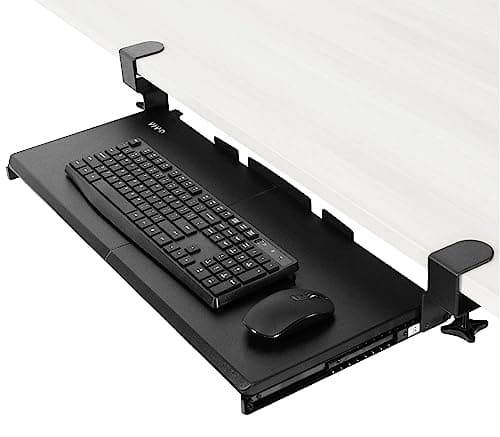
Take four measurements before you order: top thickness, clear width under the front edge, desk depth, and the distance from the front edge back to any crossbar. Those four decide whether you are installing a clamp-on tray in ten minutes with no tools — the VIVO MOUNT-KB05Eis the one for that — or a screw-in tray in half an hour with a drill. Nearly every failed keyboard tray install is a measurement that was never taken, not a mistake with a screwdriver.
The four measurements
| Measurement | Why it matters | Typical limit |
|---|
| Top thickness at the front edge | Clamp jaws have a hard maximum | 1.25 in on the VIVO |
| Clear width under the front edge | Clamps and rails need an unobstructed run | 32.5 in for the VIVO clamps |
| Desk depth | Slide rails need somewhere to retract to | 18 in for the Mount-It! |
| Front edge to crossbar | A beam under the top blocks the rails | 14.17 in on the HUANUO; the EUREKA tolerates beams |
Measure the thickness at the edge itself, not at the apron behind it — a 1-inch top with a 2-inch front rail reads as 2 inches to a tape and as 1 inch to a clamp. Our desk thickness guide for clamp-on gear covers bevels, lips and hollow cores, which are the three edges that defeat clamps.
The one rule that protects your desktop
Never use a screw longer than the ones in the box, and never drill deeper than the top is thick. A screw-in tray mounts into the underside of a desktop that is often only 0.6 to 0.75 inches thick. A 1-inch screw in a 0.6-inch top comes through the surface you work on, and no amount of filler makes that invisible again.
The safe method takes ten seconds: measure the top thickness, subtract about an eighth of an inch, and wrap a piece of masking tape around your drill bit at that depth. Drill until the tape touches the wood and stop. Do the same arithmetic on the screws — if the supplied screws are longer than your top is thick (it happens on thin flat-pack desks), the honest answer is a clamp-on tray instead, not a shorter screw that barely bites.
Clamp-on: the ten-minute version
Hold the tray in place with the keyboard already on it and mark where the clamps will sit. Keep them clear of the legs, the drawer runners and your knees. Tighten both clamps by hand in turn — not one fully, then the other, or the tray mounts crooked and the slide binds. Hand-tight is the specification: a clamp tightened with pliers dents a soft top and does not hold any better.
Then check it again a week later. Clamps settle into a melamine or veneered top as the material compresses, which is normal and is why they loosen once. If yours is on a soft top, a strip of felt or thin rubber between the jaw and the surface spreads the load and leaves no mark — the same trick our monitor arm damage guide recommends for arm clamps.
Screw-in: the right order
1. Set the height before you mark anything.Sit at the desk with your chair at its working height and hold the tray where your forearms want it. That position — not flush under the desktop — is where the rails go. Mounting rails tight to the apron is the most common install mistake, and it is what leaves a tray that is still too high.
2. Check the chair.Roll the chair in. Armrests collide with trays far more often than knees do, and the collision is invisible until the tray is screwed on. If the arms foul it, the fix is a tray mounted further back, flip-up arms, or a different chair — see office chair fit for small spaces.
3. Mark through the rail, not from the instructions. Hold the rail or the template up and mark the actual holes with a pencil or a bradawl. Paper templates stretch and print at the wrong scale.
4. Pilot, then drive. Taped bit, pilot holes, then the supplied screws by hand or on the lowest clutch setting your driver has. Particleboard strips instantly on a power setting meant for timber.
5. Attach the tray and test the slide empty.It should run with one finger. If it binds, one rail is lower or further forward than the other — loosen both, square them, retighten.
6. Set the tilt last, with the keyboard on it. Tilt the far edge down, not up: negative tilt is what keeps your wrists straight once the keyboard sits below elbow height. Five to ten degrees is usually enough, even on a tray that offers 43.
Five things that go wrong, and the fix
| Symptom | Cause | Fix |
|---|
| Tray hits the chair arms | Mounted too far forward for the chair | Remount further back, or flip-up arms |
| Screw tip showing on the desktop | Screw longer than the top is thick | Remove, fill, switch to a clamp-on tray |
| Slide binds or sticks halfway | Rails not parallel or not level | Loosen both, square to the front edge, retighten |
| Tray still feels too high | Rails mounted flush to the apron | Lower the rails, or use a tray with height adjustment |
| Clamps loose after a week | Soft top compressing under the jaw | Retighten by hand; add felt or rubber padding |
What to do when the desk has a drawer
This is the install that most often cannot be done, and it is better to know before the box arrives. A full-width drawer under the desktop leaves no mounting surface and no retract space. Three real options: mount the tray belowthe drawer if there is 5 or more inches of clearance and your knees still fit; use a clamp-on tray on a desk edge beside the drawer; or accept that the answer is a different piece of gear — a desk converter raises the screen instead of lowering the keyboard, and gets to a similar place from the other direction.
Glass, metal and hollow-core tops
None of the three trays here mounts to glass. Screws need material to bite into and clamps concentrate force on an edge that can crack. On a glass desk the keyboard stays on the top, and the depth has to come from somewhere else — our glass desk roundup says the same thing about every clamp-on accessory, which is the real hidden cost of a glass desk. A hollow-core top (two thin skins over a cardboard honeycomb) will take a clamp but not a screw, because there is nothing behind the skin.
How long it takes, honestly
Ten minutes for a clamp-on tray, including the measuring. Twenty-five to forty for a screw-in tray, most of it spent getting the height and the chair clearance right rather than driving screws. The tools are a tape measure, a pencil, masking tape, a drill with a bit a size under the screw shank, and a screwdriver. You do not need a stud finder, a level or an extra pair of hands, though a second person makes holding the rails easier.
Which tray to buy for your desk
Thin top, no drilling allowed, 33 inches of clear width: the VIVO clamp-on. Front crossbar under the desk: the EUREKA, which states it fits beam desks. Deep wood or MDF desk and you want the tray to disappear entirely: the Mount-It!, with 15 inches of travel. If the desk is too high rather than too shallow, read your desk is too highfirst — the tray is the main fix there and the height-adjustment figure matters more than the tray size.
Our keyboard tray roundupranks the class in full with each model’s fit specs, and keyboard tray versus desk extender covers the case where a tray is not what you need at all. Prices render from the live price layer with their own “as of” date.